LaTex 论文排版:
1.一般图片插入
导言区
\usepackage{graphicx}% insert graphic
正文
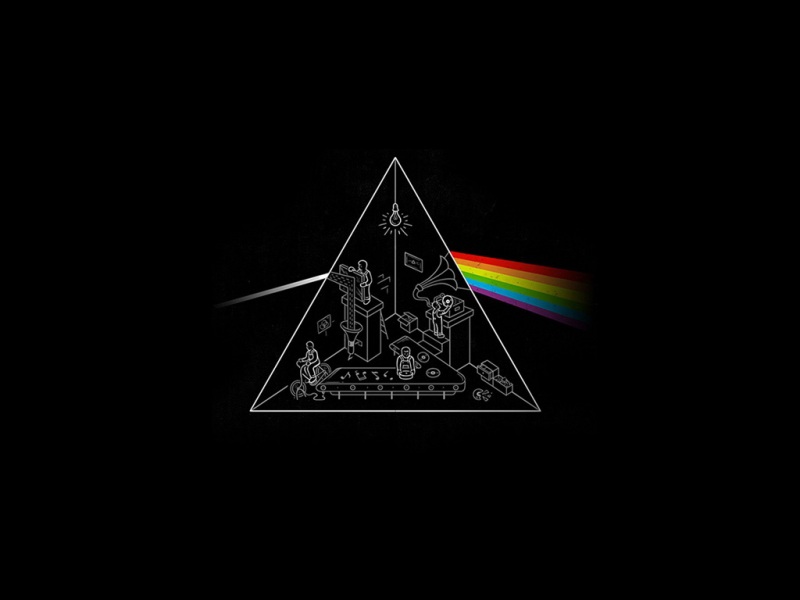
\begin{figure*}\includegraphics[width=0.75\textwidth]{fig5.png}\caption{PSD diagram}\label{fig:5} % Give a unique label\end{figure*}
可以获得如下的输出:
可以看出 图注在图片的下方(但不是正下方,如果想在正下方,需要在正文中加入\centering)
2.图注在图片右下方
(这个是以springer的模板,默认的在右下方。其实也不需要特别做修改到左上方,因为最终的layout还是要由springer的stuff来确定:这句话是来源于外网 tex求助区)使用了\sidecaption
导言区
\usepackage{graphicx}% insert graphic
正文
\begin{figure}\sidecaption%figure legend图注 把题注放在 右下方\resizebox{0.3\hsize}{!}{\includegraphics*{example.eps}}\caption{A figure}\end{figure}
可以获得如下的输出:
可以看出 图注在图片的左边
3.左右排+上下排
###左右排
导言区
\usepackage{graphicx}% insert graphic\usepackage{subcaption}
正文
\begin{figure*}\sidecaption\begin{minipage}{5cm}\centering\includegraphics[width=1\textwidth]{fig1.png}\subcaption{fig1}\end{minipage}\begin{minipage}{5cm}\centering\includegraphics[width=1\textwidth]{fig1.png}\subcaption{fig2}\end{minipage}\caption{1111}\end{figure*}
可以获得如下的输出:
上下排
导言区不变
正文
\begin{figure*}\sidecaption\begin{minipage}{5cm}\includegraphics[width=1\textwidth]{fig1.png}\subcaption{fig1}\includegraphics[width=1\textwidth]{fig1.png}\subcaption{fig2}\end{minipage}\caption{1111}\end{figure*}
结果如图所示:
4.使用subcaption插入并排图片
在引言处加入
\usepackage{subcaption}
\begin{figure}[H]\caption{经纬线提取样例}\label{fig:example}\begin{subfigure}{.5\textwidth}\centering\includegraphics[width=\textwidth]{before.png}\caption{提取经纬线前}\end{subfigure}\begin{subfigure}{.5\textwidth}\centering\includegraphics[width=\textwidth]{after.png}\caption{提取经纬线后}\end{subfigure}\end{figure}
此处参考了wiki百科关于latex图片排版的知识:/wiki/LaTeX/Floats,_Figures_and_Captions
##5.使用SC环境来使得题注放置在其他位置##
SC指的是 sidecaption 表示 旁边的题注
\begin{SCfigure}\centering\includegraphics[width=0.5\textwidth]{atoms_in_cavity.jpg}\caption{A picture of a gull}\end{SCfigure}
6.将图注放在左上方的一种方法##
记得新建一个文件,写下这段代码
\documentclass{article}\usepackage{graphicx}\usepackage{caption}\usepackage{subcaption}\usepackage[innercaption]{sidecap}\sidecaptionvpos{figure}{t}\begin{document}\begin{SCfigure}\begin{minipage}{9cm}\subcaptionbox{A subfigure\label{fig:sub1}}{\includegraphics[width=1\textwidth]{fig1.png}}\\%若去掉\\后则是横排,特别注意\subcaptionbox{Another subfigure\label{fig:sub2}}{\includegraphics[width=1\textwidth]{fig1.png}}\end{minipage}\caption{11111111111111111111111dhfsdfjsddfkkkkkkk\protect\\sfsjkkkkkkkkkkkkkkkkkkkkkkkkkkkkkkkkk}\end{SCfigure}\end{document}
得到的图片如图所示:
但是仍和标准的排版有差距(待解决),以下图片为 标准论文图片:
为了本处的东西,问了百度知道,小木虫,知乎,最后在知乎上有个大佬给了一个链接,是从这个链接中得到答案的:
/questions/47927/placing-caption-on-the-top-right-or-top-left?answertab=active#tab-top
大佬还说了一句话,多用用Google,我深表认同
##7.caption过长换行##
用latex写论文时caption往往会过长,导致两幅图的caption贴在一起很不美观,这时就需要换行了。
虽然直接用\都可以达到效果,但往往会报错或警告。
这时候就要使用\protect保护一下啦,即\protect\\即可。
##8.caption重置##
\usepackage{caption}\usepackage[labelfont=bf,textfont=normalfont,singlelinecheck=off,justification=raggedleft]{caption}\usepackage{subcaption}\usepackage[labelfont=normalfont,textfont=normalfont,singlelinecheck=off,justification=default]{subcaption}
注意:labelfont表示 标号字体(例如Fig1) text font表示 标题内容字体
bf表示 加粗
jusitification表示位置,其中raggerdright 在左方
常用选项[htbp]是浮动格式:
『h』当前位置。将图形放置在正文文本中给出该图形环境的地方。如果本页所剩的页面不够,这一参数将不起作用。
『t』顶部。将图形放置在页面的顶部。
『b』底部。将图形放置在页面的底部。
『p』浮动页。将图形放置在一只允许有浮动对象的页面上。
一般使用[htb]这样的组合,只用[h]是没有用的。这样组合的意思就是latex会尽量满足排在前面的浮动格式,就是h-t-b这个顺序,让排版的效果尽量好。
!h 只是试图放在当前位置。如果页面剩下的部分放不下,还是会跑到下一页的。一般页言,用 [!h] 选项经常会出现不能正确放置的问题,所以常用 [ht]、[htbp] 等。
如果你确实需要把图片放在当前位置,不容改变,可以用float宏包的[H]选项。不过如果这样做,出现放不下的问题时需要手工调整。使用格式如下:\usepackage{float}
\begin{figure}[H] foo \end{figure}
如果觉得《(研究生)LaTex论文排版:插入图片及相关功能》对你有帮助,请点赞、收藏,并留下你的观点哦!


![[Latex]手动作者页排版(不使用模板)|图片环绕|作者简介|插入图片|图片说明|Picinpar](https://sm.tqys.net/uploadfile/pic/426.jpg)