参考文章:/article/index.php?md=py-bmp
功能描述:获取图片像素值,格式是rgb888,取出rgb565的有效数据,再将像素值BGR888保存成bmp格式的图片,并预览bmp图片。
需要强调的是,bmp文件格式要求像素数据大小必须是4的整倍数,即一行的总字节数不是4的整倍数时,就在行尾补0。比如,一行有3个像素,共9字节,9不是4的整倍数,需要补3字节的0,变成12字节。每行的末尾都需要补0。
import osfrom PIL import Imageimport numpy as npimport imageiofrom PIL import ImageFileImageFile.LOAD_TRUNCATED_IMAGES = Trueclass bmp:""" bmp data structure """def __init__(self, w=1080, h=1920):self.w = wself.h = hdef calc_data_size (self):if ((self.w * 3) % 4 == 0):self.dataSize = self.w * 3 * self.helse:self.dataSize = (((self.w * 3) // 4 + 1) * 4) * self.hself.fileSize = self.dataSize + 54def conv2byte(self, l, num, len):tmp = numfor i in range(len):l.append(tmp & 0x000000ff)tmp >>= 8def gen_bmp_header (self):self.calc_data_size();self.bmp_header = [0x42, 0x4d]self.conv2byte(self.bmp_header, self.fileSize, 4) #file sizeself.conv2byte(self.bmp_header, 0, 2)self.conv2byte(self.bmp_header, 0, 2)self.conv2byte(self.bmp_header, 54, 4) #rgb data offsetself.conv2byte(self.bmp_header, 40, 4) #info block sizeself.conv2byte(self.bmp_header, self.w, 4)self.conv2byte(self.bmp_header, self.h, 4)self.conv2byte(self.bmp_header, 1, 2)self.conv2byte(self.bmp_header, 24, 2) #888self.conv2byte(self.bmp_header, 0, 4) #no compressionself.conv2byte(self.bmp_header, self.dataSize, 4) #rgb data sizeself.conv2byte(self.bmp_header, 0, 4)self.conv2byte(self.bmp_header, 0, 4)self.conv2byte(self.bmp_header, 0, 4)self.conv2byte(self.bmp_header, 0, 4)def print_bmp_header (self):length = len(self.bmp_header)for i in range(length):print("{:0>2x}".format(self.bmp_header[i]), end=' ')if i%16 == 15:print('')print('')def paint_bgcolor(self, pixel):self.rgbData = []self.rgbData += pixeldef save_image(self, name="save.bmp"):f = open(name, 'wb')# write bmp headerf.write(bytes(self.bmp_header))# write rgb datazeroBytes = self.dataSize // self.h - self.w * 3#计算图像的每行后面需要的补充0的个数pixel_array = np.array(self.rgbData).reshape(self.h,self.w*3) #将像素值list转换成np.arrayfor r in range(self.h):l = []for i in range(0,len(pixel_array[r]),3): #索引图片每行像素p = pixel_array[r][i] # b vaule; 8bitl.append(p & 0x00ff)p = pixel_array[r][i+1]# g vaule; 8bitl.append(p & 0x00ff)p = pixel_array[r][i+2]# r vaule; 8bitl.append(p & 0x00ff)f.write(bytes(l))#写入bmp文件中for i in range(zeroBytes): #用于每行像素后补0f.write(bytes([0x00]))f.close()def convert_img_to_a8rgb565(im):im_bytes = list()for (r, g, b, a) in list(im.getdata()):r = r & 0xF8g = g & 0xFCb = b & 0xF8im_bytes += [b, g, r] #bmp文件数据位BGR格式return im_bytesdef convert(picture_path):for filename in os.listdir(picture_path):picture = os.path.join(picture_path, filename)print(picture) #打印文件名称bmp_file_name = filename.split('.')[0]img = Image.open(picture).transpose(Image.FLIP_TOP_BOTTOM).convert("RGBA") #PIL获取的图片会旋转,这里将其旋转回正图img_width , img_hight = img.sizeimg_bgr = convert_img_to_a8rgb565(img) #获取bgr数据,listimage = bmp(img_width, img_hight) #创建bmp文件image.gen_bmp_header() #写入bmp文件头信息##image.print_bmp_header()#打印出bmp文件头部信息image.paint_bgcolor(img_bgr)image.save_image('./conver_pic/'+bmp_file_name+'.bmp')print('picture convert over...')def scan(picture_path):for filename in os.listdir(picture_path):picture = os.path.join(picture_path, filename)print(picture) #打印文件名称src_img = Image.open(picture)src_img.show() #显示图片def main(source_picture_path,convert_picture_path): #原图路径、转换后的保存路径convert(source_picture_path)scan(convert_picture_path) #预览转换后的bmp图片if __name__ == "__main__":main("./ori_pic/",'./convert_pic/')
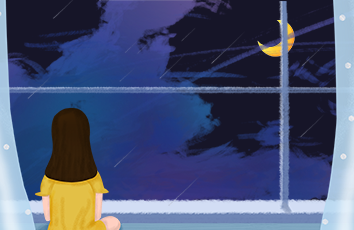
由于做了像素的丢位,所以转换后的图片可观察出有色差
如果觉得《python实现RGB888格式的图片数据保存到bmp文件》对你有帮助,请点赞、收藏,并留下你的观点哦!